You know how to complete a route, but which route should you choose? Good Hansa Teutonica strategy starts with comparing what a move earns against what it costs: actions, pieces, and the opportunities you give your opponents.
This guide is for players who know the turn sequence and want to make better decisions on the base Hanseatic League board, without optional modules. For setup and a worked first turn, use the beginner’s walkthrough; for exact action restrictions, use the rules reference.
1. Make your opening upgrades pay
Moving from two actions to three gives you 50% more actions each turn. That makes an early Actions upgrade attractive, especially if you can reach it without a prolonged fight. But getting there has a cost: count the placements, income actions, and displacement you will need.
Example: suppose you expect to spend four actions securing an upgrade that adds one action per turn. Over six later turns, that extra capacity can repay the investment. With only two turns likely to remain, the same detour is much harder to justify. This is a rough comparison, not a guarantee: opponents and immediate rewards matter too.
Read the next exposed value before committing. The Actions track has repeated numbers, so an upgrade does not always add an action immediately. If everyone is fighting over Göttingen, compare the full cost of joining them with an available scoring route or another useful ability.

2. Make displacement work for you
Being displaced can help you develop your position. You relocate the displaced piece and can bring extra pieces onto nearby routes. A trader on a route someone urgently needs can therefore become a useful invitation: they pay to clear it, while you gain presence elsewhere.
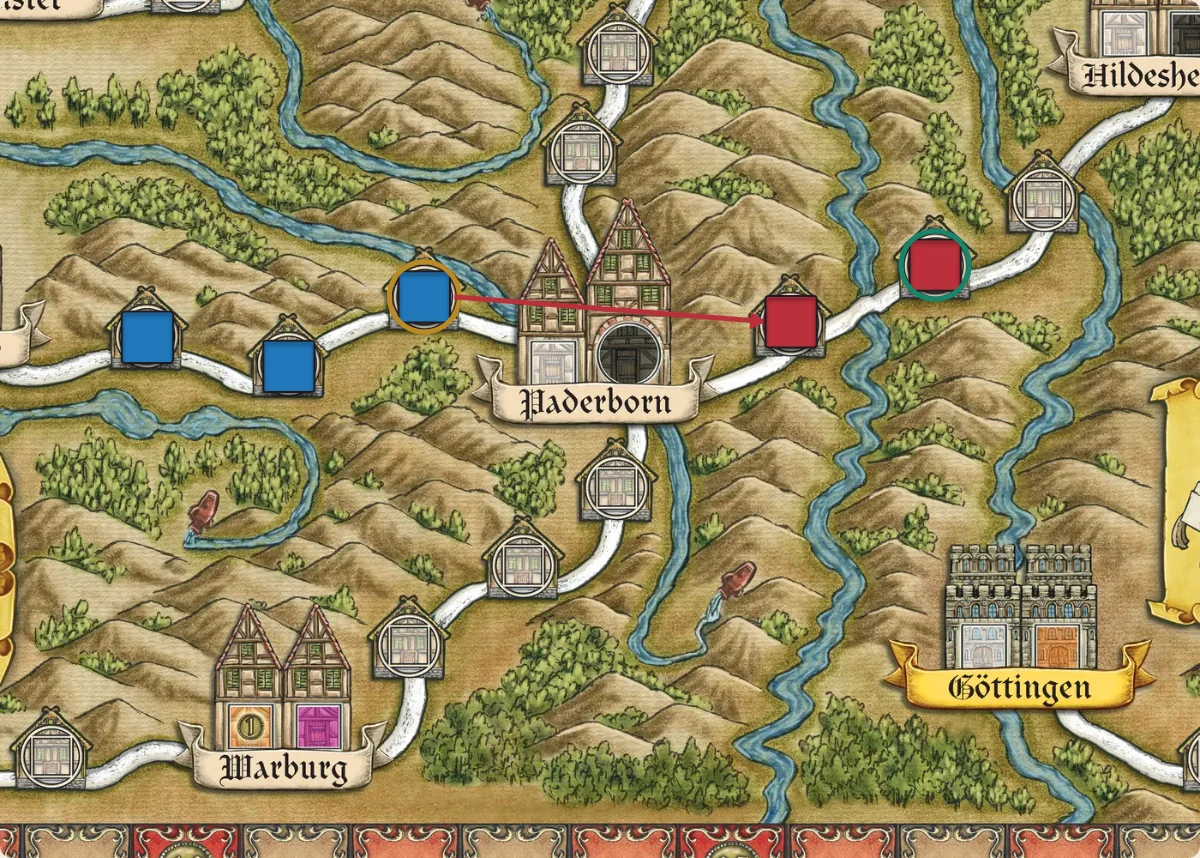
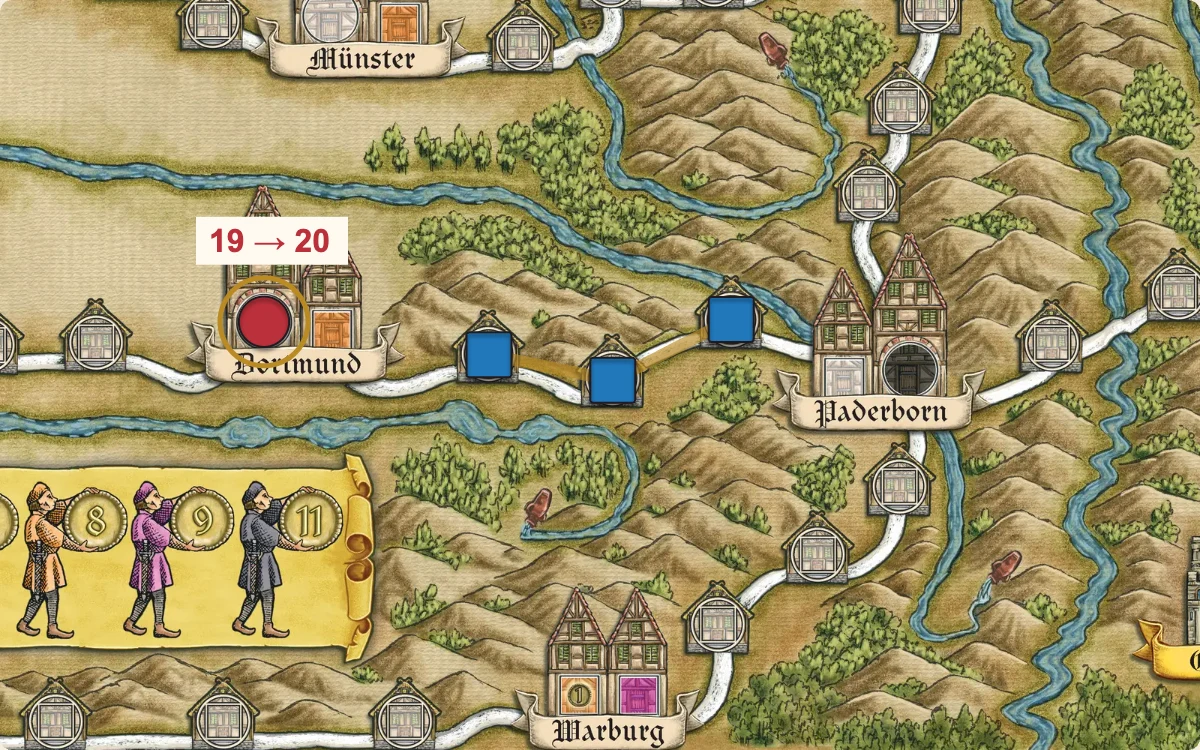
Example: before blocking the last space on an opponent’s route, identify where you would place your pieces if displaced. In the example below, Blue replaces Red on Dortmund–Paderborn. Red relocates to Paderborn–Hildesheim and adds a trader from stock. If that adjacent route advances your own upgrade or network plan, the block gives you two acceptable outcomes. If the nearby spaces are useless, you may simply strand a trader.
Apply the same thinking when you are the one displacing. Ask what your opponent will gain. Paying to finish a valuable route can be sensible; paying repeatedly to feed their next route can be expensive. Merchants cost more to displace than traders, so use that extra resistance deliberately.
3. Establish posts where others want to play
City control can earn you points when other players complete adjacent routes. Look for cities beside upgrades or other destinations the table keeps using. A post there may contribute more than one in a quiet corner, even if the quiet route is easier to finish.
Control is vulnerable, though. Check the remaining office spaces and your opponents’ Privilege before assuming a city will keep paying. A later post can change who controls it.
When comparing two possible posts, ask three questions: does it help my network, can I hold control, and will players keep completing routes here? A location that serves several purposes deserves a closer look.
4. Keep your pieces working
Extra actions lose value if you spend them repeatedly refilling an empty personal supply. Notice your actual bottleneck. If you keep stopping for Income, Bank may help. If your pieces are scattered across unfinished routes, movement and Book of Knowledge may offer a better solution.
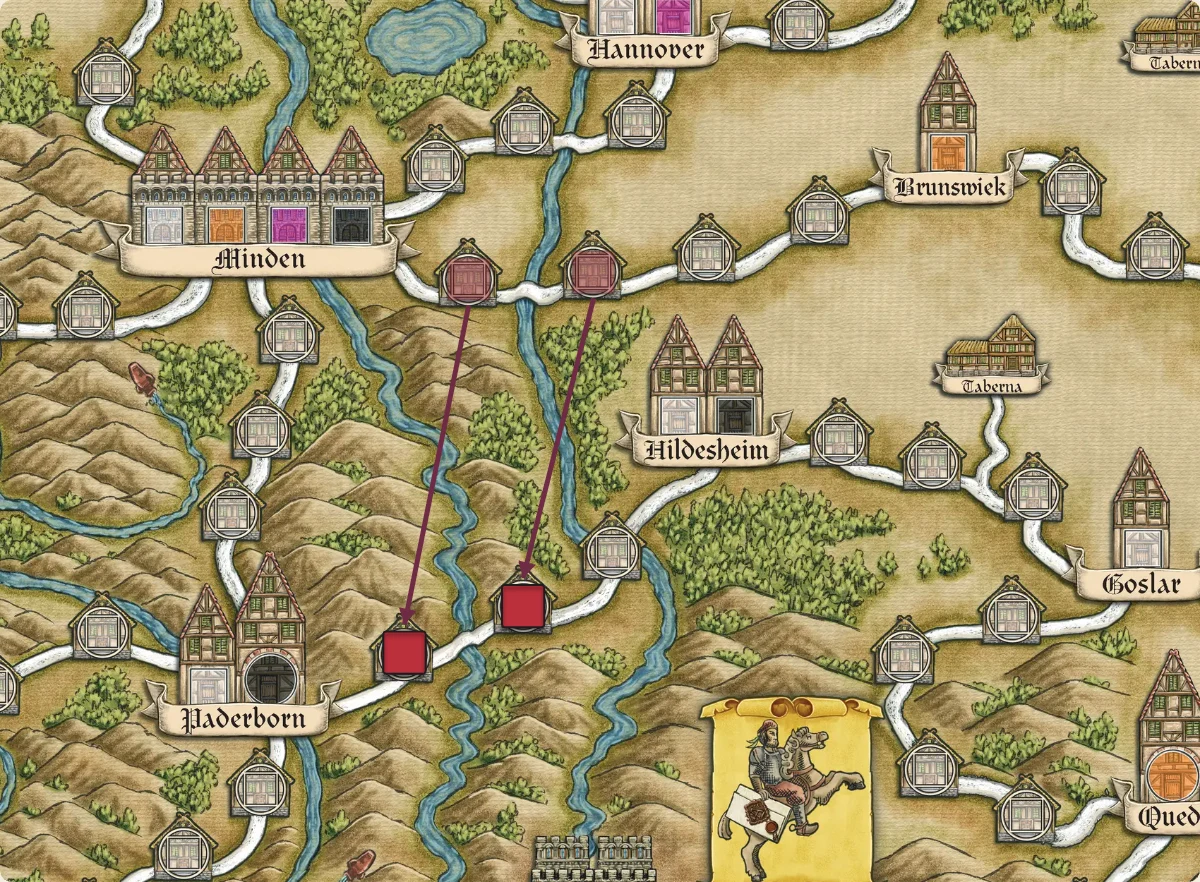
Example: two of your traders sit on routes you no longer intend to finish. The arrows below move two stranded traders from Minden–Brunswiek to Paderborn–Hildesheim in one action. Faded pieces show their old positions. You improve your position without placing two fresh pieces from supply.
Plan through to completion. Filling the final empty connection point does not itself complete the route: leave an action to create it. Before starting a project, check your supply, the pieces already available on the board, and whether you can finish before someone interferes.
5. Build a network before chasing City Keys
City Keys multiply the trading posts in your largest connected network. They are most valuable when you already have something substantial to multiply.
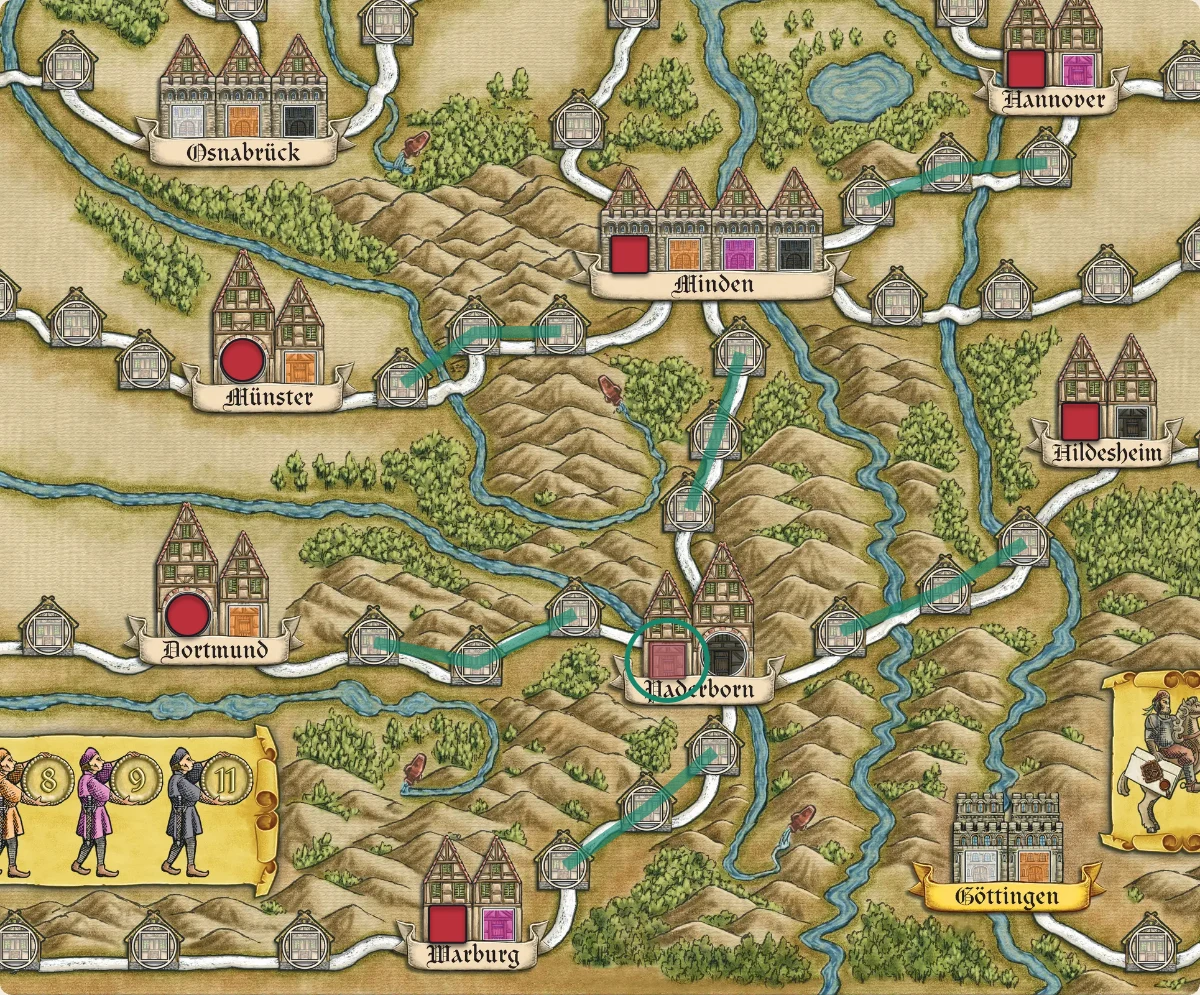
In the position below, a post in Paderborn joins the three-post Münster–Minden–Hannover network to your separate posts in Dortmund, Warburg, and Hildesheim. At Keys ×2, your network score rises from 6 to 14. The circled, faded piece is the proposed new post. You do not need to control every city in your network, so a shared city can still be strategically valuable.
Avoid collecting isolated posts without a plan to connect them. Likewise, check that your next Keys upgrade actually increases the multiplier: this track also contains a repeated value.
6. Give bonus markers a job
A marker is worth considering for both its effect and its contribution to end-game scoring. When choosing a route, ask what the marker would let you accomplish next, rather than collecting it simply because it is nearby.
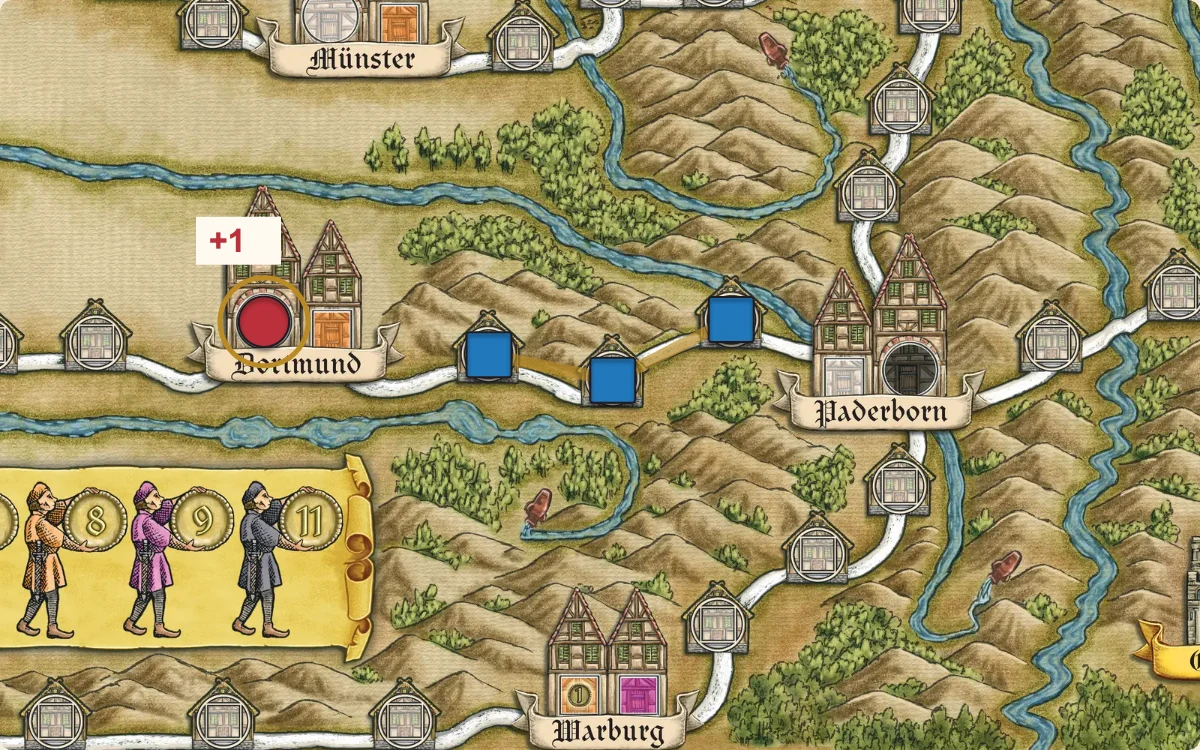
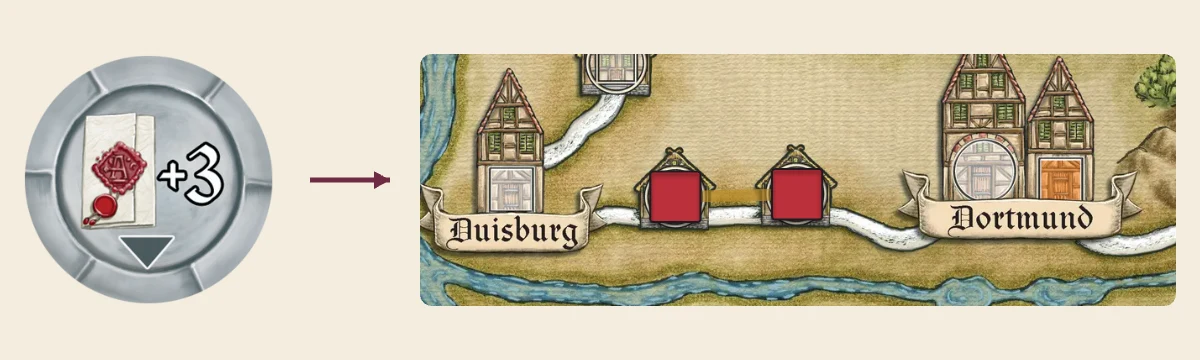
The +3 Actions marker below can fund two placements and the action to create the two-space Duisburg–Dortmund route, provided you have two traders in supply and a legal reward available. An ability upgrade can avoid an awkward detour. A trading-post effect may improve a key city. The useful choice depends on your position.
Do not save a powerful effect indefinitely while waiting for a perfect turn. A modest gain now may beat an unused opportunity when someone ends the game. When placing a replacement marker, consider which player is best positioned to claim it.
7. Choose a scoring plan you can finish
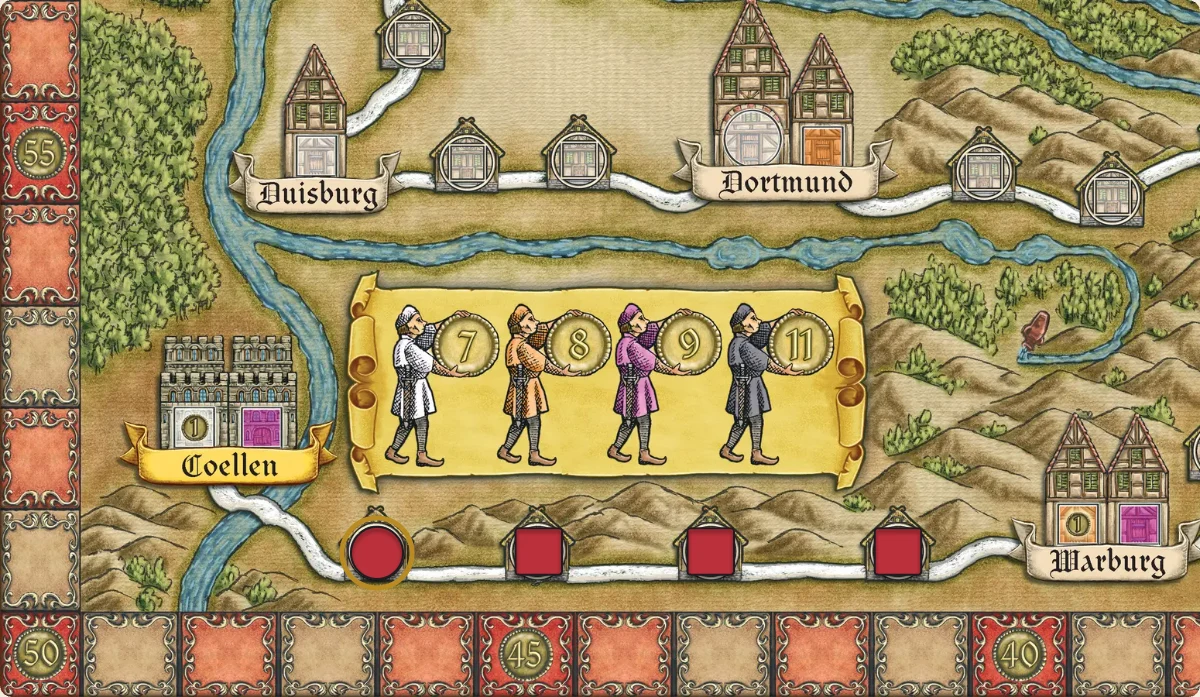
Your board should suggest your next investment. A growing connected network makes Keys attractive. Repeated traffic through your cities rewards control. Access to Coellen may justify preparing a merchant and the necessary Privilege.
The danger is paying the setup cost for several plans and completing none. Before changing direction, name the reward and count the actions still required. A high-value destination is less appealing if an opponent can occupy it before you arrive.
Keep a second option available, especially on a crowded board. Flexibility means having another useful move when a route closes; it does not require pursuing every scoring opportunity at once.
8. Decide whether you want another round
The visible score track is only part of the result. Before helping to end the game, compare networks, Keys, city control, completed abilities, collected markers, and special scoring spaces. You can lead on the track and still lose the final tally.
Watch all three base-board endings: a player reaching 20 track points, the tenth city filling, or a required replacement bonus marker being unavailable. The triggering action finishes, but there is no final round.
Example: a rival is close to 20 on the track and controls a city beside your planned route. Completing that route could award them the point that ends the game. Estimate the final totals before giving them that opportunity.
If your estimated final score is ahead, look for a safe way to finish. If you are behind, identify a realistic scoring swing and preserve enough time to achieve it. The right pace follows the likely final score, not just who appears to be winning.
A simple practice plan for your next game
- Opening: compare the cost of your first Actions upgrade with your best alternative. Check the ability tracks if you are unsure what it reveals.
- Middle game: choose posts that connect your network or benefit from traffic. Know where you would move after being displaced.
- Late game: estimate final scores and ask whether another round helps you more than your rivals. Use the scoring reference to check your total.
- Afterwards: find one detour that failed to repay its cost and one move that served multiple purposes.
For exact action restrictions and scoring, use the full rules reference and official English rulebook. Once you are comfortable on the base board, the expansions guide explains your next options.