You can make your own Hansa Teutonica map on playhansa.app: upload a board image, place cities, draw routes, add upgrades, validate it, test it against a computer opponent, and submit it for review. This guide covers each step in the online map editor. It's for the digital game, not a printable board.
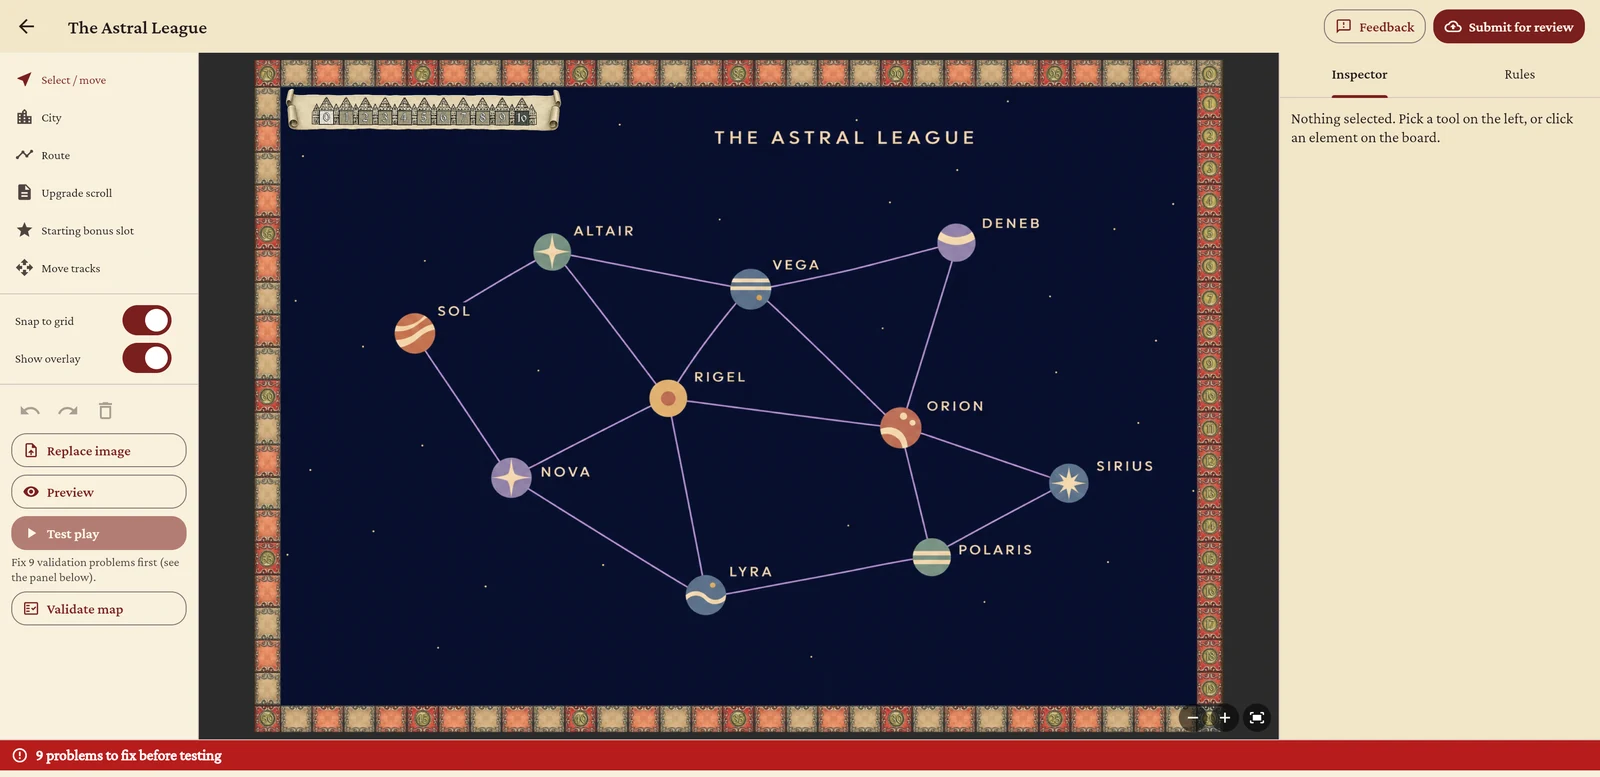
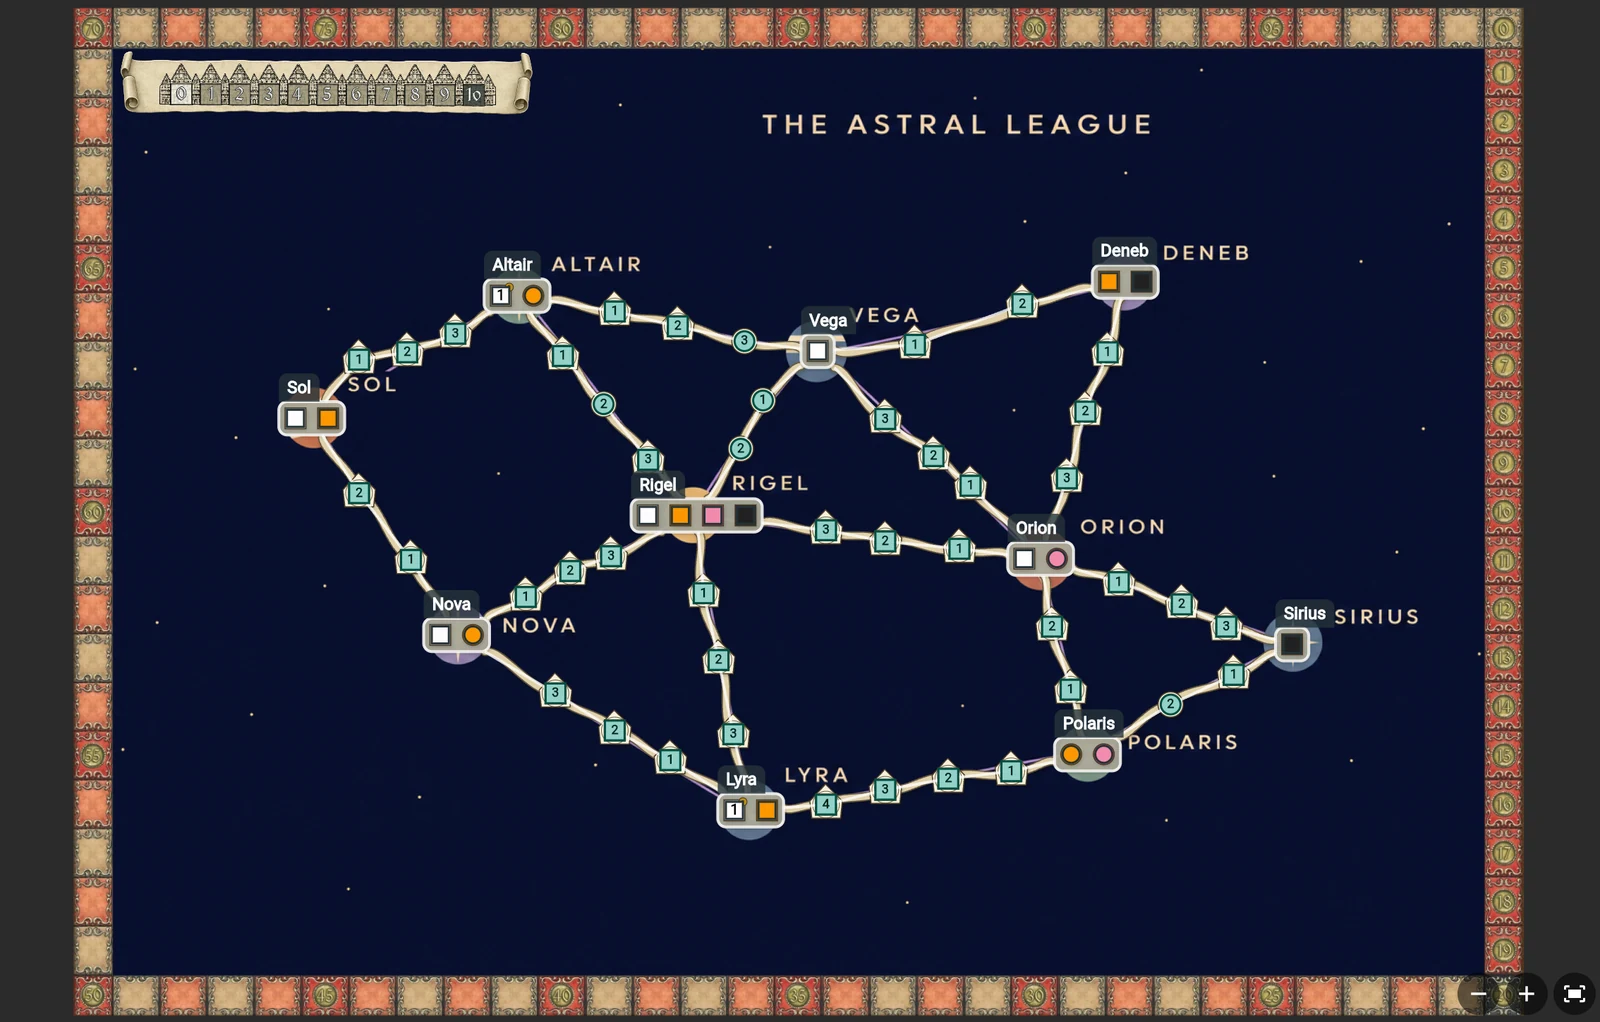
To show it, I built a demo board called The Astral League: ten planets joined by trade routes, against a starfield background. It's here to teach the editor and isn't headed for the community map list. The demo took about 30 minutes to build. Give yourself more time for your first map, especially if you're creating the artwork and working out the layout as you go.
01Plan your custom Hansa Teutonica map layout
Start with circles and lines. The artwork can come later.
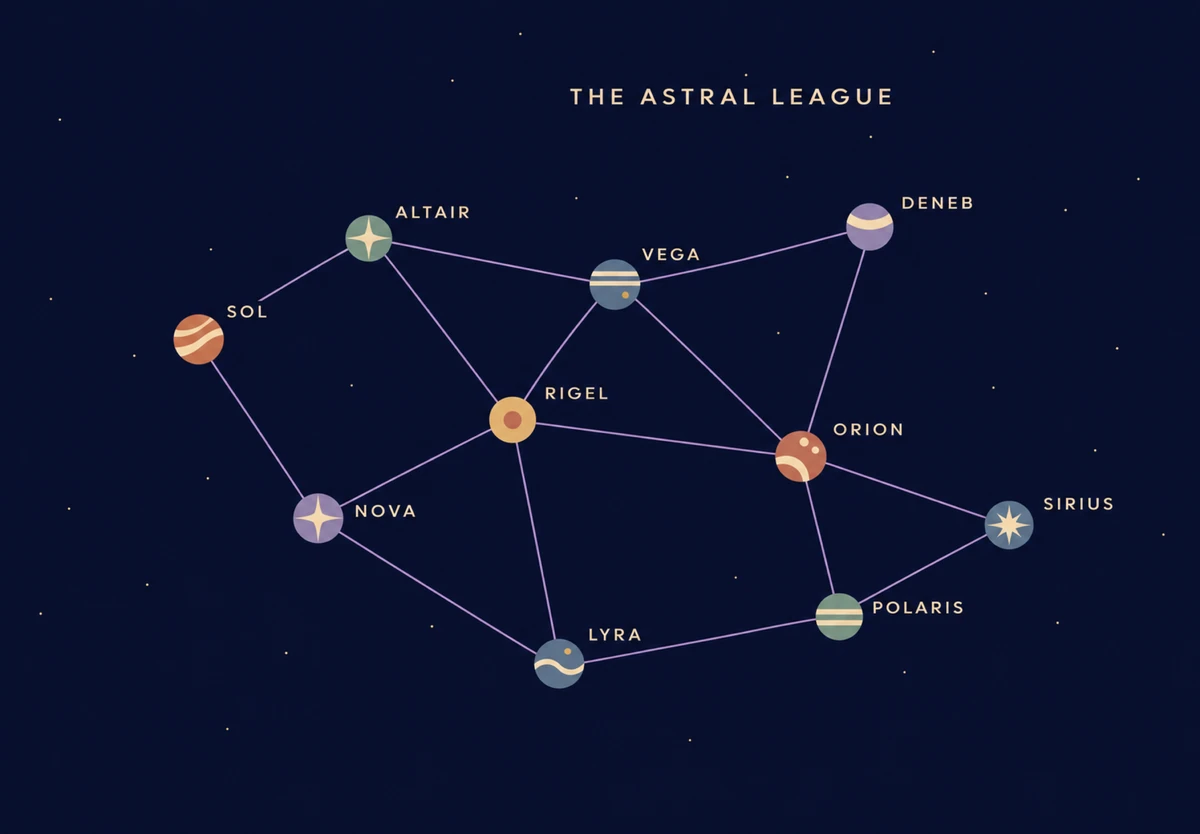
The Astral League has ten locations: Sol, Altair, Vega, Deneb, Nova, Rigel, Orion, Sirius, Lyra and Polaris. I spread them irregularly so some journeys are long and some are short, with Rigel and Orion acting as links between parts of the network.
Before placing anything, decide where you want players to compete, and make sure a blocked route always leaves another way across. Treat the first layout as a draft; you'll see what's wrong with it once you play on it.
Not sure what to map? A real region, your home town, a fantasy continent or a fictional galaxy all make good boards. Whatever the theme, you'll be building the same things: cities, routes, upgrades and a few starting bonuses.
02Prepare your board artwork
Your uploaded image is the background. Cities, trading posts, route spaces, upgrades and bonus slots are added in the editor. A line in the artwork looks like a route, but the game still needs to know which cities it connects and where pieces can sit.
The Astral League background is AI-generated, and you can use it to follow along or for your own map. It's already sized for a landscape board.
Get the image size right
| Format | Image dimensions |
|---|---|
| Landscape | 3912 × 2720 pixels |
| Portrait | 3912 pixels high, 2726–2755 pixels wide |
Keep uploads within 15 MB. Images must match the chosen format; they aren’t automatically resized to fit.
Leave space around cities for posts and pieces. Keep the edges clear for the VP track and the upper-left area clear for the default completed-cities track. The editor can draw both overlays for you.
If you make your own artwork, use images you own or have permission to use and share. A scan of a commercial board isn’t suitable for submission.
03Create your map in the editor
- Open playhansa.app in a desktop browser and sign in.
- Open your profile menu and choose My Maps.
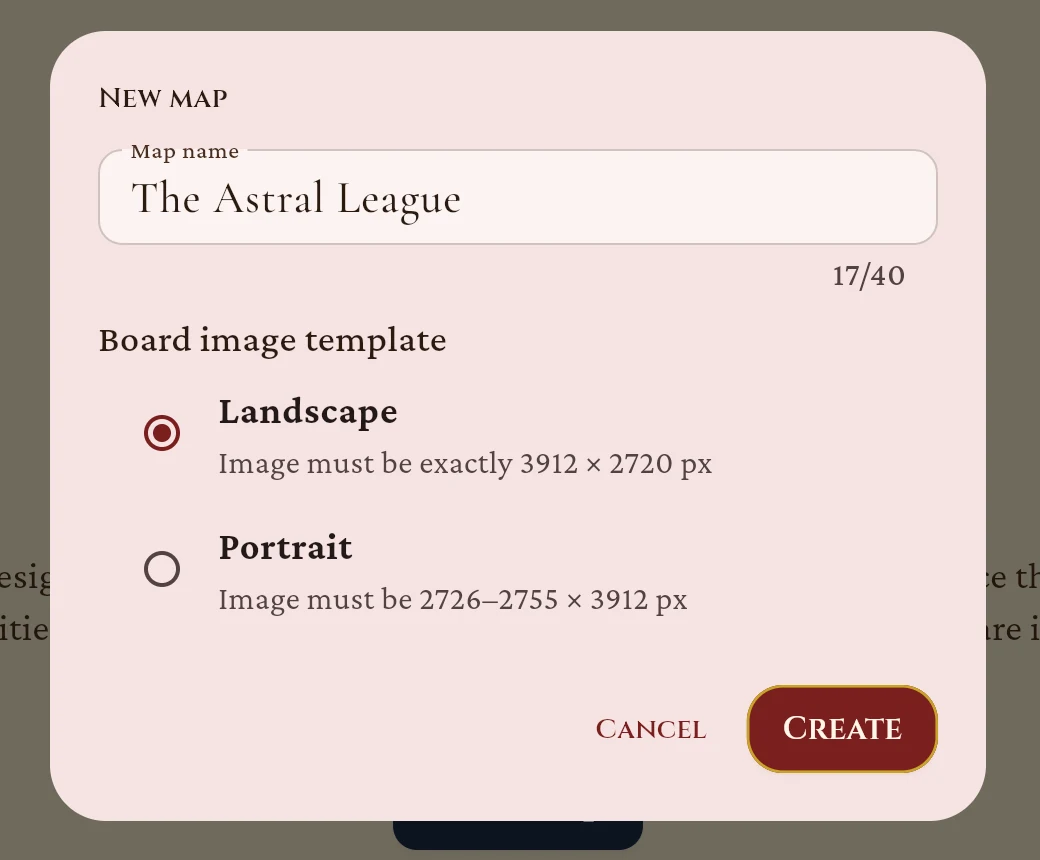
- Select + New map, enter The Astral League, and choose Landscape.
- Create the map, then select Upload board image and choose your background.
The tools sit on the left, the board occupies the centre, and the inspector and rules settings sit on the right. Use Select / move to select and reposition elements.
04Add cities and trading posts
They’re trading stations in our story, but they’re still cities in the editor and follow the familiar game rules.
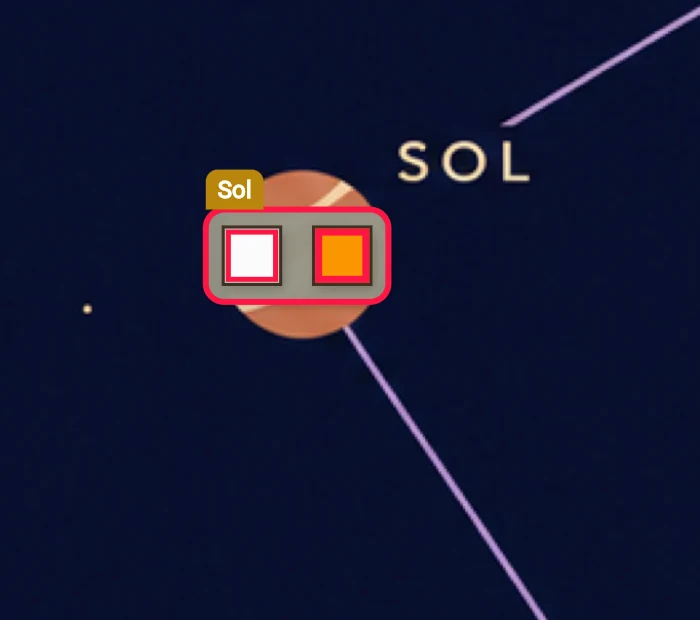
- Choose City and click at Sol’s position.
- Name it Sol.
- Choose Select / move, select Sol, and configure its trading posts in the inspector.
In this early step, Sol has two cube-shaped posts: white, then orange. Set each post’s privilege colour and piece shape independently. The + Post control adds another space; the arrows change their order.
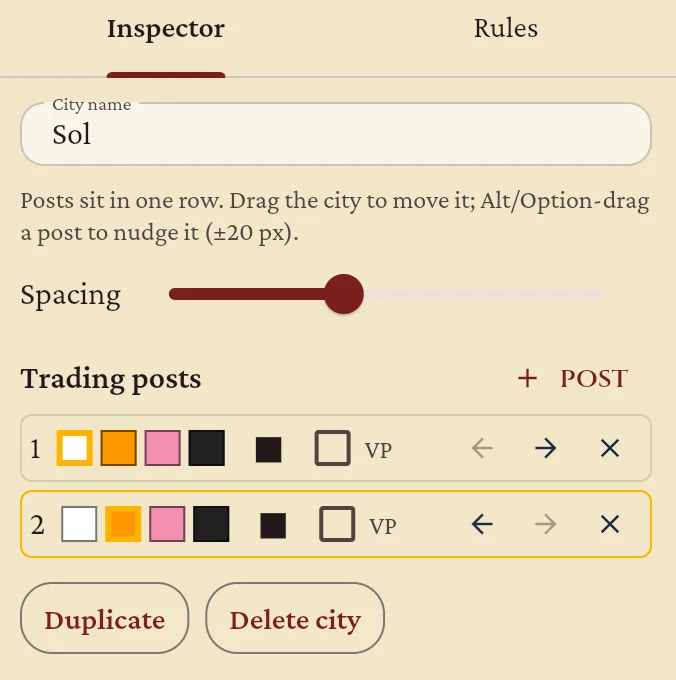
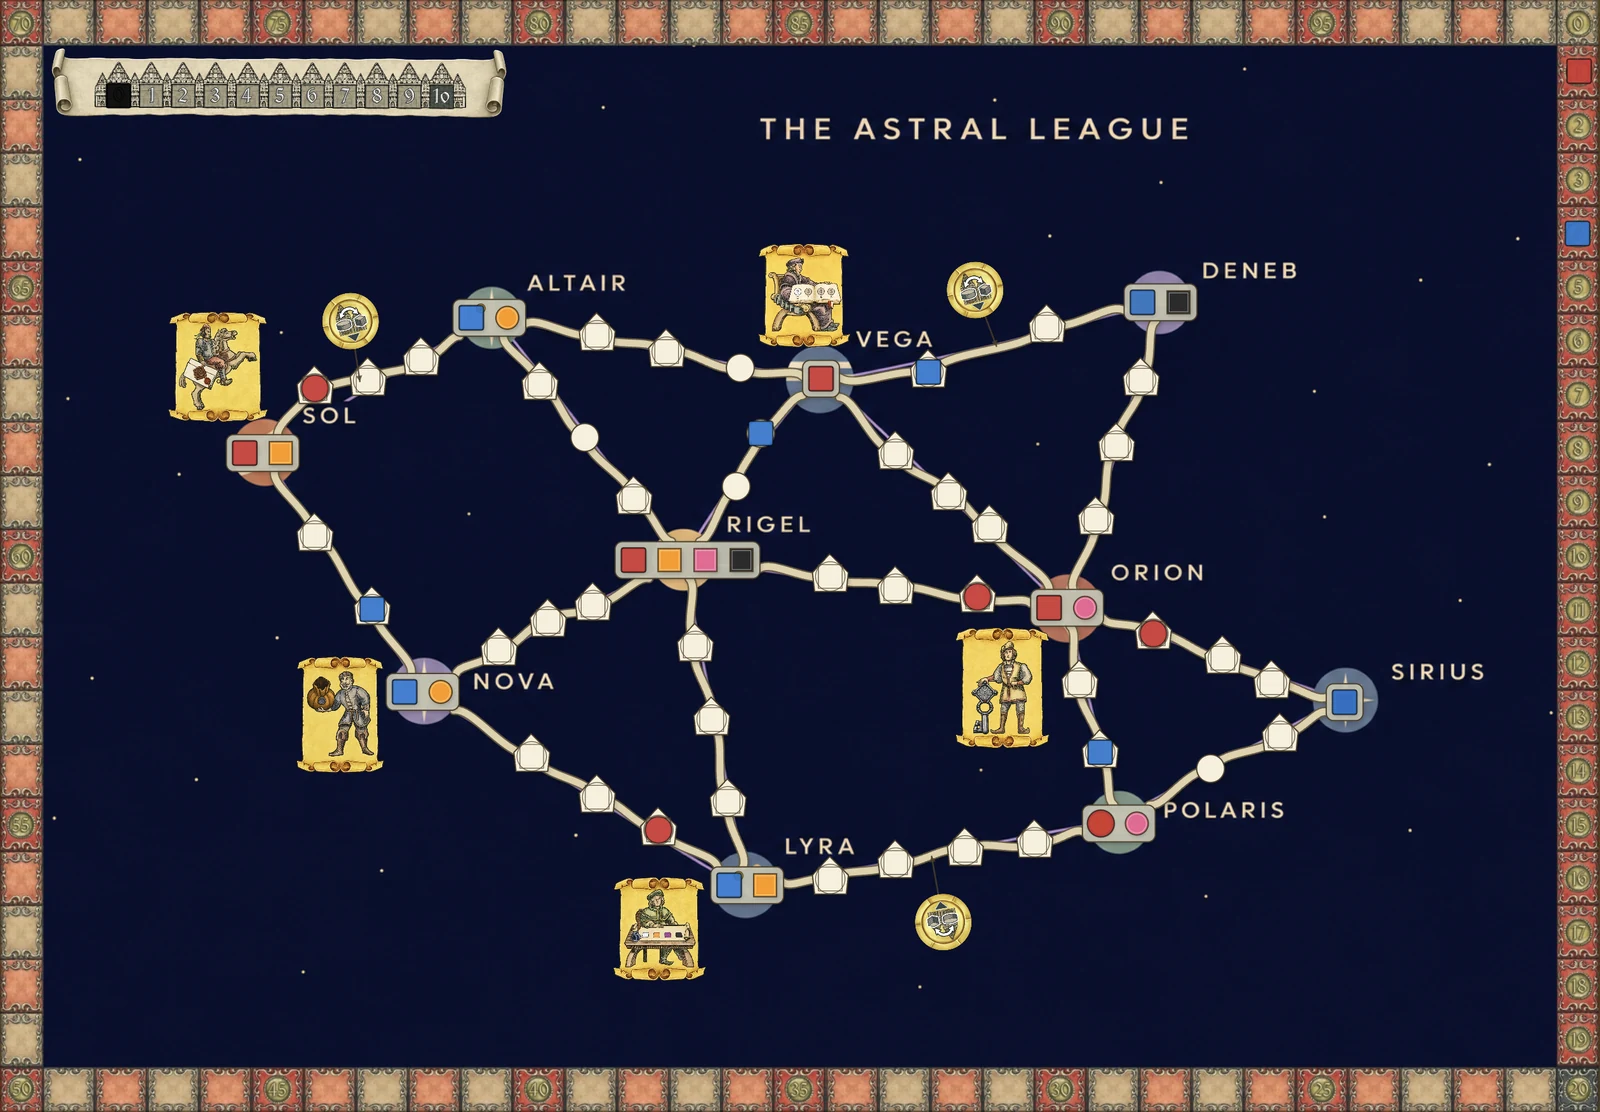
I added the other nine the same way, varying the posts as I went. A merchant-only space or a higher privilege requirement changes when a city is worth taking. I'm not listing every city's posts: look at the finished board above and copy what you like, or better, invent your own. Leave room around each city for its row of posts and its label, and use Undo and Redo freely.
05Connect your cities with routes
Begin with Sol → Altair:
- Choose Route.
- Click Sol, then Altair.
- Click along the path to place three connection points, working from Sol toward Altair.
- Select Finish route.
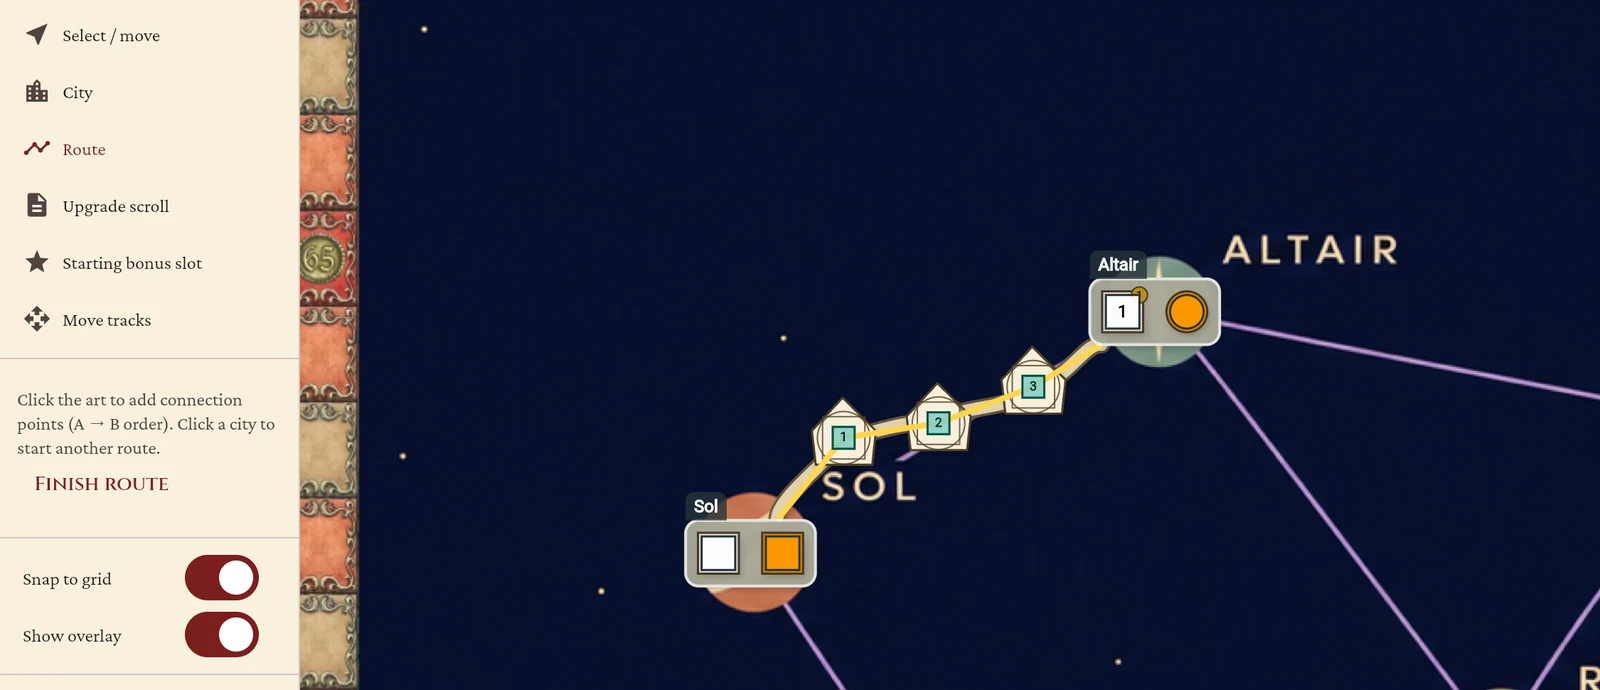
Connection points are the spaces players occupy. You must place them even when the background already contains a line between the cities.
Do the same for the rest of the network. Every city needs at least one route, and the whole network must be connected. Vary route lengths and piece requirements instead of making every connection match the first.
06Add upgrades, bonus slots and board rules
Give players a reason to travel
Choose Upgrade scroll, select an ability and its city, then drag a rectangle for its clickable area. For the first scroll, choose Actions at Sol.
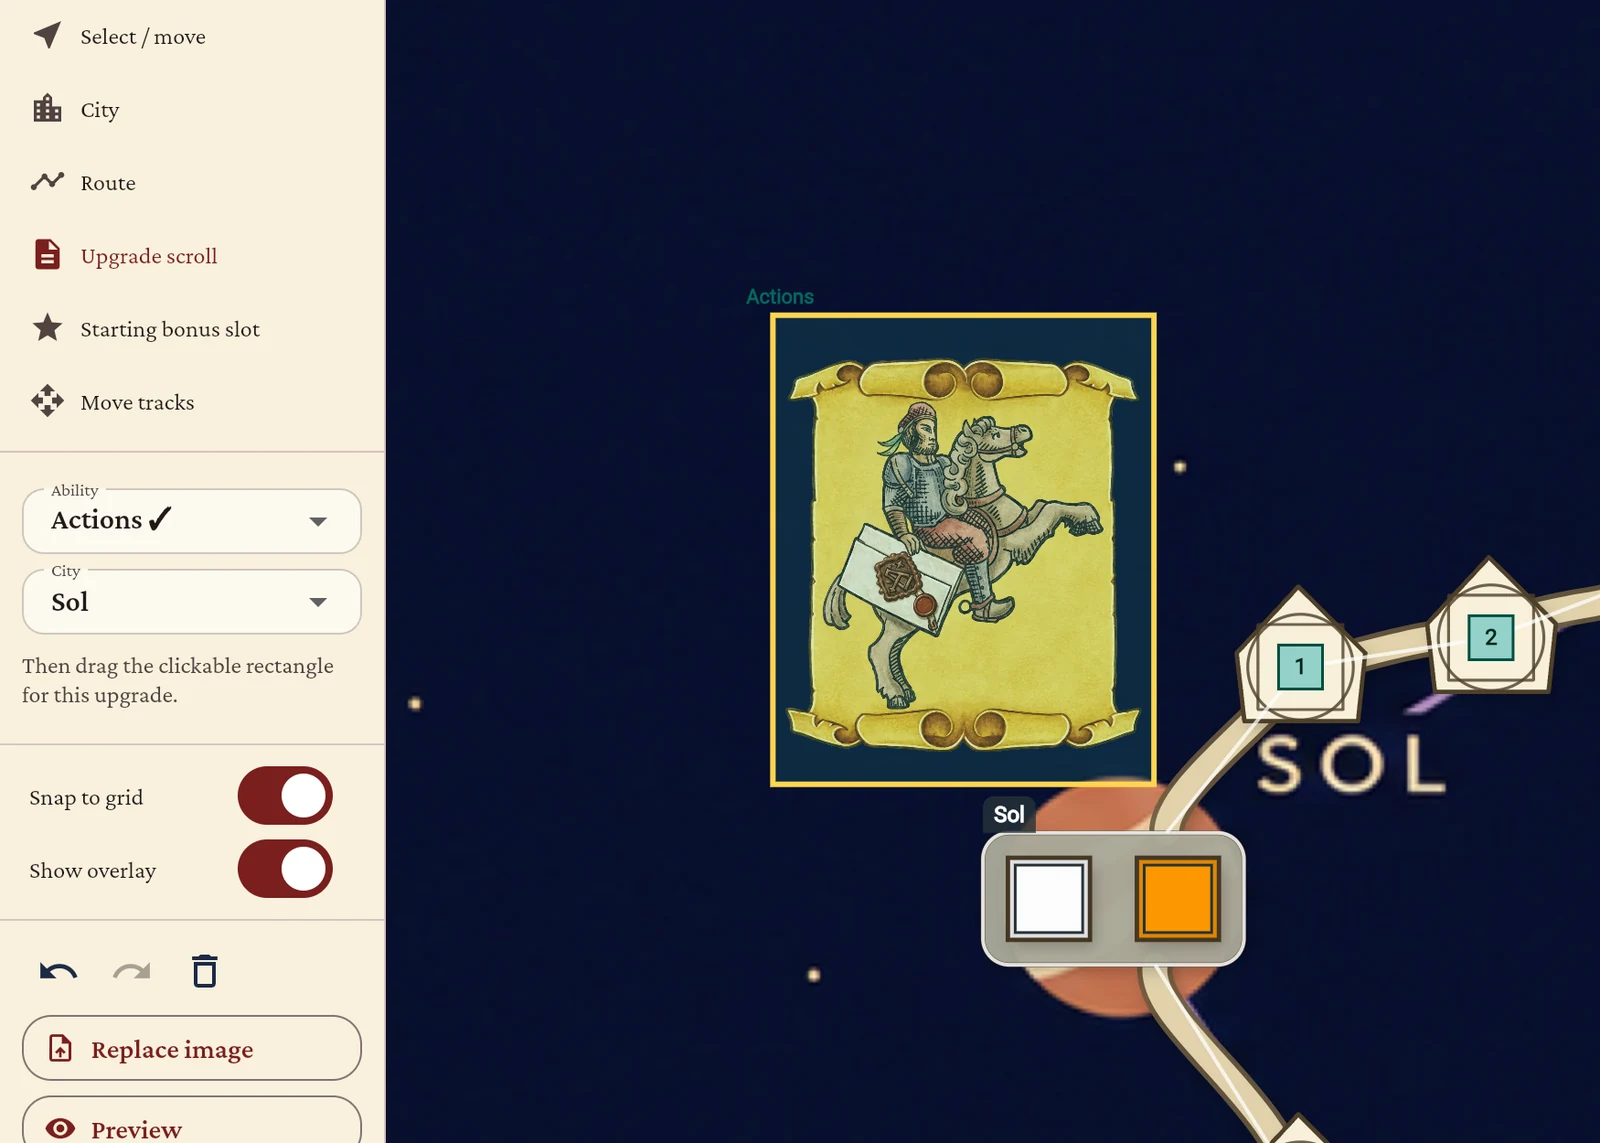
The example board uses this assignment. Place exactly one scroll for each of the five abilities:
| City | Upgrade |
|---|---|
| Sol | Actions |
| Vega | Book of knowledge |
| Nova | Bank |
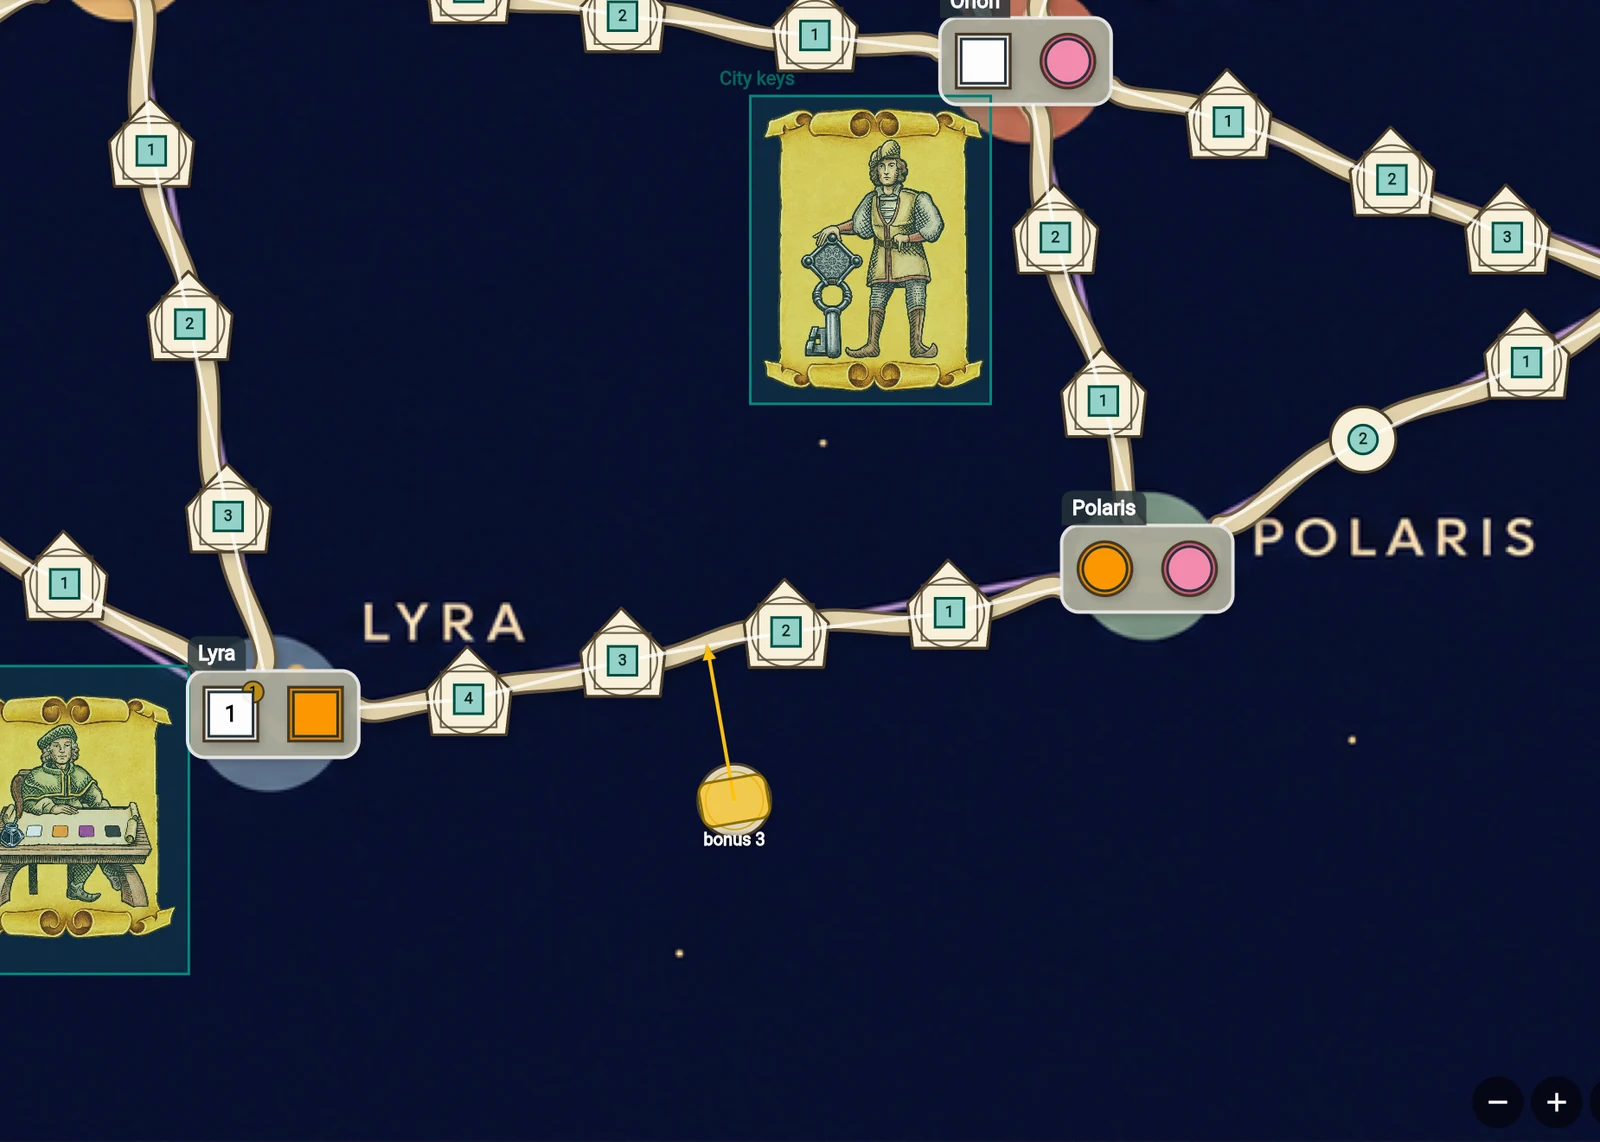
| Orion | City keys |
| Lyra | Privilege |
The editor draws the standard scroll illustrations over your background, so leave room for them and keep each clickable rectangle clear of posts and route spaces. If your artwork already includes its own scrolls, you can line the rectangles up with those instead.
Add three starting bonus slots
Choose Starting bonus slot and place a slot on a route. You need three slots on three distinct routes. Our example uses Sol–Altair, Vega–Deneb and Lyra–Polaris. Drag the white handle to adjust a slot’s rotation.
Set the rules for your first test
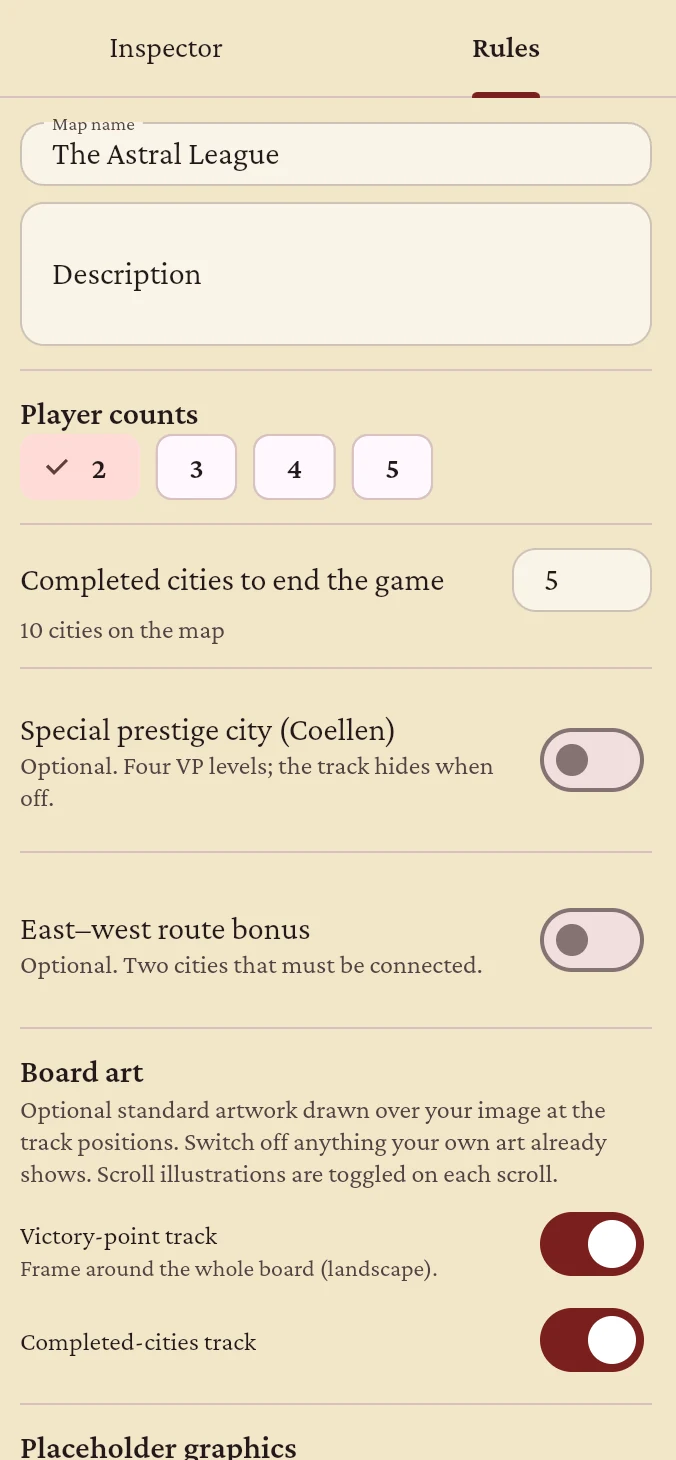
- Player counts: 2 only.
- Completed cities to end the game: 5.
- Special prestige city: off.
- East–west route bonus: off.
- Victory-point track: on.
- Completed-cities track: on.
These suit a compact ten-city board. Custom maps can support 2–5 players, but only enable a count once you've played it.
The completed-city setting controls that particular ending condition; it doesn’t replace the other normal game endings.
Check that the track overlays sit well on your artwork, and use Move tracks to nudge them. If you painted the tracks into your image, turn the overlays off.
07Validate and test your custom map
Select Validate map and read the results. Errors identify required fixes before testing or submission. Warnings highlight issues worth inspecting.
This is the one thing validation caught on my board: I'd placed only two starting bonus slots, and it asked for a third. Adding it on another route cleared the error.


Green doesn't mean silent: four warnings remain. These screenshots were taken while the map was still set to five players, so the density warning refers to that setting; after changing player counts, validate again. A small network like this one may be too sparse for five.
See it with pieces on the board
Open Preview to check how posts, tracks, markers and sample pieces sit on your image. Turn Overlay off to hide the editor’s city outlines and labels for a cleaner view.
Then select Test play, choose 2 players and Easy computer difficulty, and start a private test game. I only played enough turns on The Astral League to check that everything displayed and worked, but for a map you plan to release, play it properly.
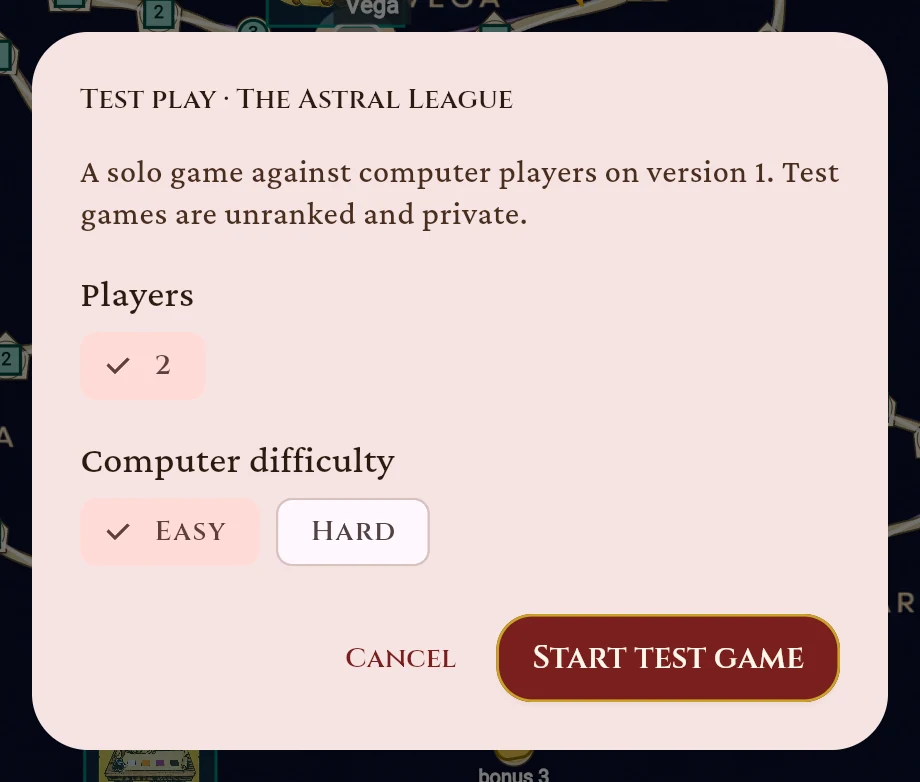
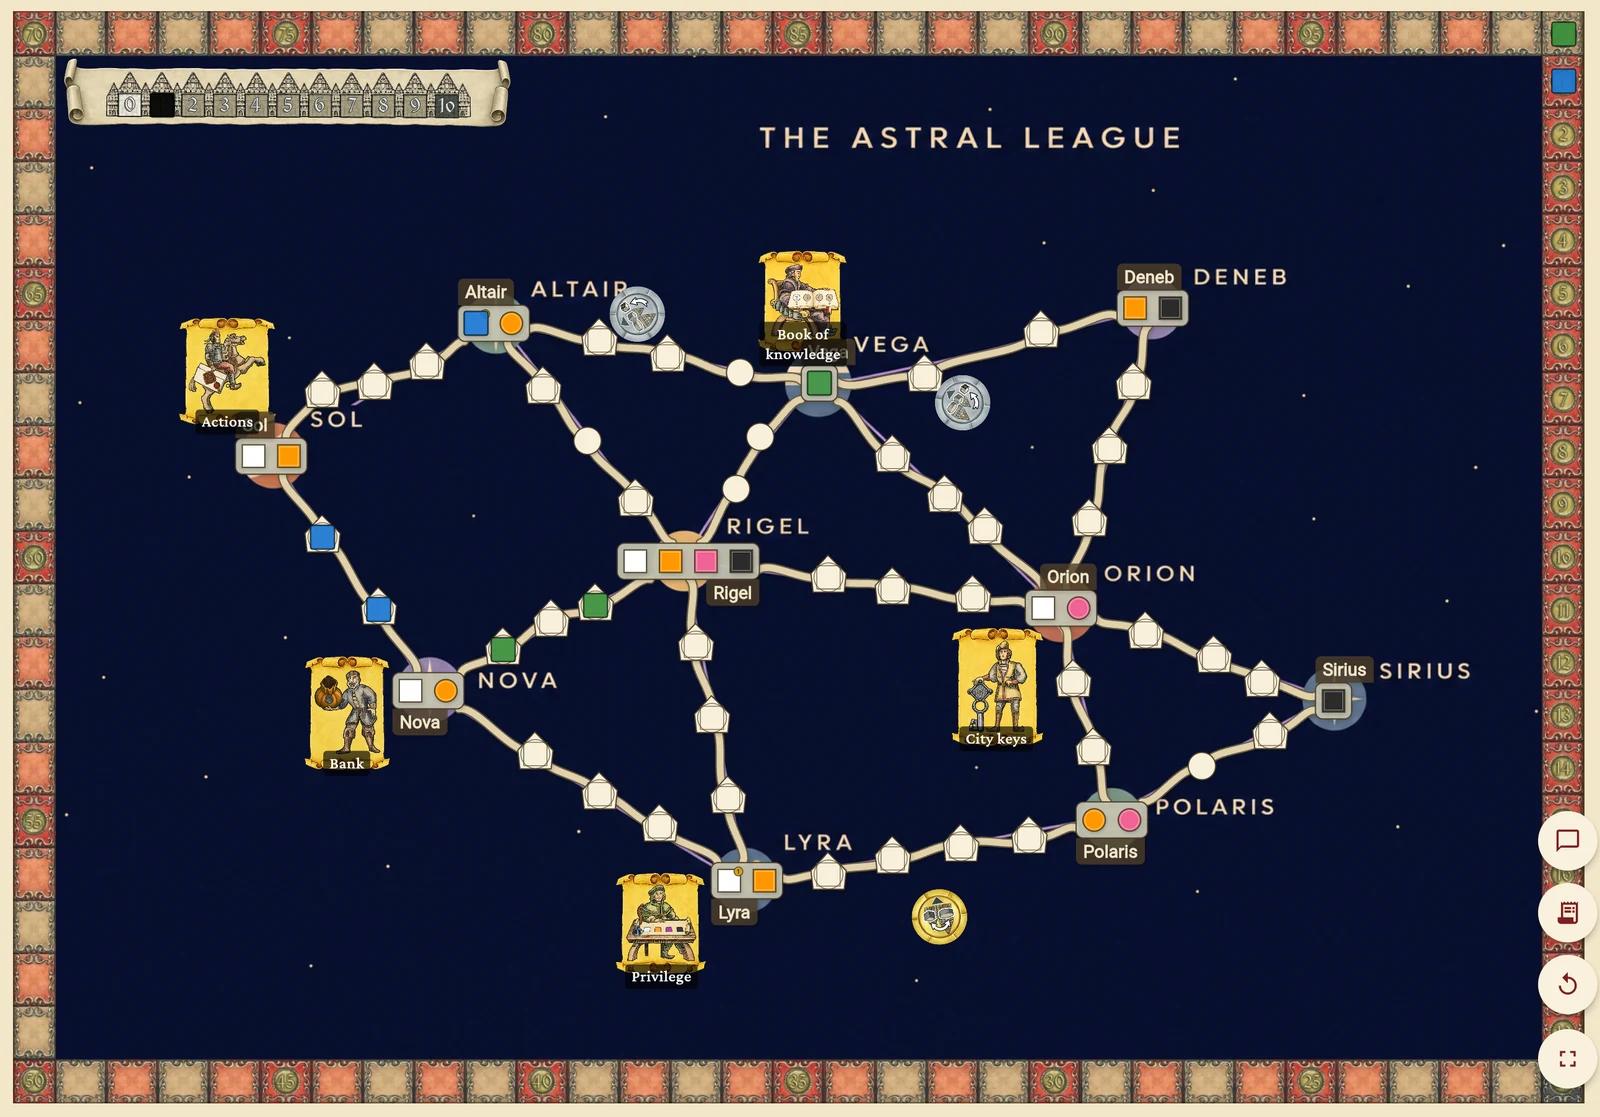
While you play, watch the board as well as your moves. Can you tell the pieces from the background? Are posts, route spaces and upgrades easy to click? Is there a sensible alternative when someone takes your preferred route? Change one thing at a time, then test again. Games against people will turn up problems the computer won't.
08Submit your map for community review
This last step is optional. I went through it to capture the screens, but The Astral League is a teaching example and I'm not releasing it. When you have a map you're happy with, and have played the player counts it supports, select Submit for review.
Confirm that you own the image rights or have permission to use it, and that it isn’t a scan of a commercial board. You can leave an optional note for the reviewer, including where the artwork comes from.
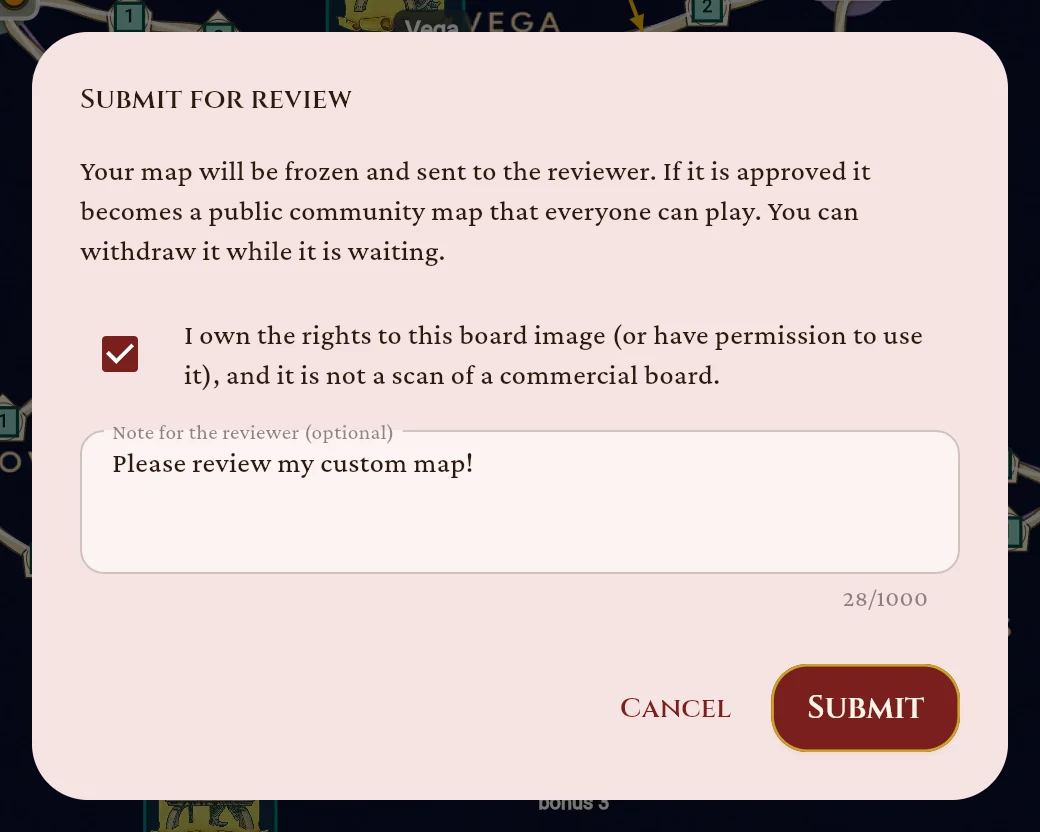
Submitting freezes your draft while it's reviewed. You can withdraw it if you need to make changes.

Check My Maps for the status and review feedback. If changes are requested, revise and submit again. Once approved, your board becomes available in the community map picker, where signed-in players can choose it for games with friends or computer opponents.
That's the whole process. If you build something, I'd like to see it.
Custom map questions
Do I need Premium to create a custom map?
No. A free account covers creating, testing and submitting one custom map. Premium lets you create more.
Can I create maps on my phone?
Creation and editing require a desktop browser. Playing approved community maps is available on supported mobile app versions.
Can custom maps support two players?
Yes. Creators can choose supported counts from two to five. Each board specifies its own supported counts, which should be tested before submission.
Why can’t I start a test game?
Upload a board image, fix blocking validation errors, and resolve save errors. Warnings can remain, but read them before proceeding.
What if my background image won’t upload?
Check its dimensions against the chosen template and keep the file within 15 MB. Landscape images must be exactly 3912 × 2720 pixels.
Do players need Premium to play my approved map?
No. Playing approved community maps is free with an account.
Can I put the victory-point track and upgrade scrolls in my own artwork?
Yes. You can paint them into your board image and turn the editor's overlays off or line them up. Token images, bonus-marker images and the names of non-city elements can't be replaced yet.
Can I use AI-generated artwork?
The Astral League background is AI-generated. Whatever you use, you must own it or have permission to use and share it, and it can't be a scan of a commercial board.
New to the game itself? Start with the Learn to Play page or the beginner’s walkthrough. For ideas to consider while testing, explore the illustrated strategy guide.